Indice
Cook a ROM from an existing ROM.
This tutorial is based on the version 1.0.0 of JCooker.
Step 0: Preliminaries
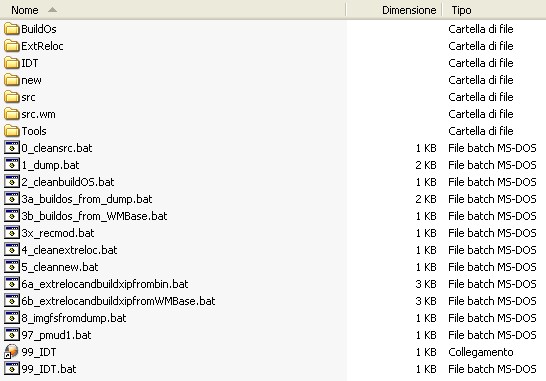
Go to the kitchen directory.
Run the batch 0_cleansrc.bat1) to clean up the directory src.
- Copy the source ROM inside the directory src and rename it to ciphone.bin.
Step 1: Dump
Run the script 1_dump.bat
Behind the scenes of 1_dump.bat
This script creates four subdirectories in src, called 1 2 3 and 4. These subdirectories are used to collect the sub-processes result's needed to unpack the ROM source.
In the directory 1 there will be the result of viva.exe ciphone.bin:
viva.exe ciphone.bin

-----------------------------------------------------------------------
¦·¦·VIVA ROM 'BIN 2 NB0'¦ñ¥¯ V1.5 -> www.592cx.com
-----------------------------------------------------------------------
NB0+-+¦ú¦    RAMInit.nb0   ¦ß+í¦+¦ª
NB0+-+¦ú¦    USBLoad.nb0   ¦ß+í¦+¦ª
NB0+-+¦ú¦       XLDR.nb0   ¦ß+í¦+¦ª
NB0+-+¦ú¦        IPL.nb0   ¦ß+í¦+¦ª
NB0+-+¦ú¦      FLASH.nb0   ¦ß+í¦+¦ª
During this step, the ROM is broken down into its components: RAMInit.nb0, USBLoad.nb0, XLDR.nb0, IPL.nb0 and FLASH.nb0.
Our main ingredient to cook the ROM will be FLASH.nb0. So I'll leave other components until it comes time to reassemble the ROM.
The script then goes to run the command osnbtool -sp flash.nb0:
osnbtool -sp flash.nb0

OS ROM Partition Tool V1.59 By Weisun :> PDAclan.com
Sector size : 0x00000800
Extra data bytes : 0x00000008
OS IMAGE found.
Partitions infomation:
**************************************
Part-0 type: BOOT SECTION image
Part-1 type: XIP RAM Image
Part-2 type: IMGFS file system
Part-3 type: legit DOS partition
**************************************
flash.nb0.PRE written.
-------------------------------------------------
Sector counters (extra-data) found in source file.
Partition 0 true offset:00000002        true size:0000027E      Len:0000027E
Partition 1 true offset:00000280        true size:000006C0      Len:000006C0
Partition 2 true offset:00000940        true size:0000BD00      Len:0000BD00
Partition 3 true offset:00000000        true size:00000000      Len:00012DC0
flash.nb0.OS.NB written.
The resulting files flash.nb0.PRE and flash.nb0.OS.NB are saved into the directory 2.
In the next step 1_dump.bat split flash.nb0.OS.NB into 4 partitions: boot.bin, xip.bin, imgfs.bin e legitDos.bin.
osnbtool -d flash.nb0.os.nb 0 boot.bin

OS ROM Partition Tool V1.59 By Weisun :> PDAclan.com
Sector size : 0x00000800
Extra data bytes : 0x00000000
OS IMAGE found.
Partitions infomation:
**************************************
Part-0 type: BOOT SECTION image
Part-1 type: XIP RAM Image
Part-2 type: IMGFS file system
Part-3 type: legit DOS partition
**************************************
Signature: SRPX
CompressVersion: 5
Uncompressed size: 300000
Deompress processing...
Successfully decompressed to boot.bin
osnbtool -d flash.nb0.os.nb 1 xip.bin

OS ROM Partition Tool V1.59 By Weisun :> PDAclan.com
Sector size : 0x00000800
Extra data bytes : 0x00000000
OS IMAGE found.
Partitions infomation:
**************************************
Part-0 type: BOOT SECTION image
Part-1 type: XIP RAM Image
Part-2 type: IMGFS file system
Part-3 type: legit DOS partition
**************************************
Can not find compression signature.
Part-1 de-packing...
Successfully de-packed to xip.bin
osnbtool -d flash.nb0.os.nb 2 imgfs.bin

OS ROM Partition Tool V1.59 By Weisun :> PDAclan.com
Sector size : 0x00000800
Extra data bytes : 0x00000000
OS IMAGE found.
Partitions infomation:
**************************************
Part-0 type: BOOT SECTION image
Part-1 type: XIP RAM Image
Part-2 type: IMGFS file system
Part-3 type: legit DOS partition
**************************************
Can not find compression signature.
Part-2 de-packing...
Successfully de-packed to imgfs.bin
osnbtool -d flash.nb0.os.nb 3 legitDos.bin

OS ROM Partition Tool V1.59 By Weisun :> PDAclan.com
Sector size : 0x00000800
Extra data bytes : 0x00000000
OS IMAGE found.
Partitions infomation:
**************************************
Part-0 type: BOOT SECTION image
Part-1 type: XIP RAM Image
Part-2 type: IMGFS file system
Part-3 type: legit DOS partition
**************************************
ERROR - Part-3 size is wrong!
These four paritions are places into the directory 3.
The last step of extraction (dump) is to unpack imgfs.bin and xip.bin and reconstruct all the packages.
We're going to extract imgfs.bin using xidump and then we'll repackage it using packagebuilder 2):
xidump imgfs.bin

XIDUMP v1.0 Beta    Copyright (c) 2009-2010 bepe    Oct 27 2009 00:17:17

 Inizializing RAW Data layer

Found IMGFS Partition...
 .hst
 .ROM
 .VM
 01cfec30-34b0-4ab8-9c07-89c16b720030.dsm

........
........
........
........

 ZipView.exe
 zlib.dll

Done!
packagebuilder.exe IMGFS

PACKAGEBUILDER 3     Copyright (c) 2007-2008 bepe     Apr 23 2008 22:12:21

[Versions]
  SYS:  5.2.23500  5500
  SYS:  5.2.23515  5500

........
........
........
........

[Missing Manifests]
  723fb954-d931-4348-b672-82a188e587b5.dsm
  cb60b333-da30-aaba-ecca-33a4568f566f.dsm

Done!
Similarly for xip.bin:
xidump -b xip.bin

XIDUMP v1.0 Beta    Copyright (c) 2009-2010 bepe    Oct 27 2009 00:17:17

 Inizializing RAW Data layer

Found XIP Partition...
 busenum.dll
 cachefilt.dll
 cecompr.dll

........
........
........
........

 sysroots.p7b

OS:
 16512.5 (Build: 5500) MSXIPKernel

Done!
Step 2: BuildOs
Run the script 2_cleanbuildOS.bat to clean up the BuildOS directory. 3)
Launch 3a_buildos_from_dump.bat
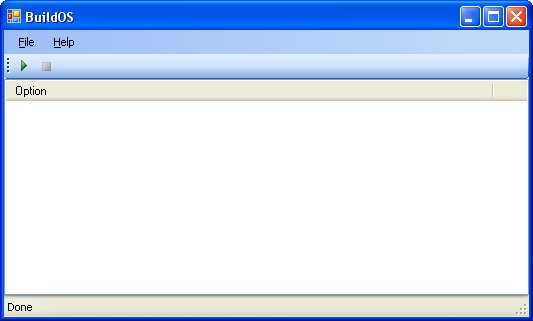
When you see the BuildOS main windos press the button with the green arrow, wait that it complete his work and close it.
Behind the scenes of 3a_buildos_from_dump.bat
The first thing the script does is to populate the directories needed by BuildOs:
Copy src\4\IMGFS\OEM —> BuildOs\OEM
Copy src\4\IMGFS\SYS —> BuildOs\SYS
Copy src\4\XIP\MSXIPKernel\boot_ms.rgu —> BuildOs\ROM\XIP\
Copy src\4\XIP\OEMXIPKERNEL\boot.rgu —> BuildOs\ROM\XIP\
It also creates registry hives exporting existing keys/values of default.hv and user.hv taken from source ROM dump.
rgucomp.exe -o default.hv > default.txt
rgucomp.exe -o user.hv > user.txt
iconv.exe -t UTF-16LE default.txt > default.ucs-2le
iconv.exe -t UTF-16LE user.txt > user.ucs-2le

copia Tools\rguheader.UCS-2LE + default.ucs-2le + user.ucs-2le ---> 034e7cf6-8a37-40ad-85bd-6851b921866a.rgu
Then the script launch BuildOS.exe that will create the file system structure and will put the registry keys contained in all *.rgu files into default.hv and user.hv taken from SYS/Metadata. The results of these operations are saved in BuildOs temp directory BuildOS/temp
Step 3: ExtReloc
Clean the workspace (as usual):
4_cleanextreloc.bat
5_cleannew.bat
Launch 6a_extrelocandbuildxipfrombin.bat
If you are not going to change IMGFS or XIP modules, you can skip the modules relocation substeps. In this case close XIPort and Extreloc windows as soon as they appear, and copy the file xip.bin from src/3 to new/1 (create the directory new/1 if it does not exists) and proceed with Step 4: build imgfs
**********************
* [xipport] Dump xip *
* [xipport] Close    *
**********************
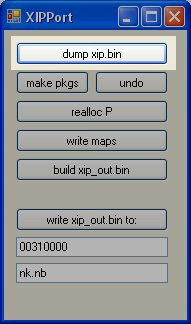
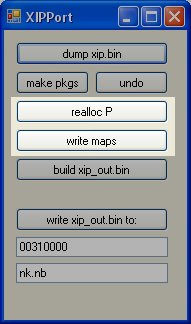
Press then dump xip.bin button and then close XIPPort. 4)
The file xip.bin will be unpacked in the ExtReloc\OUT.
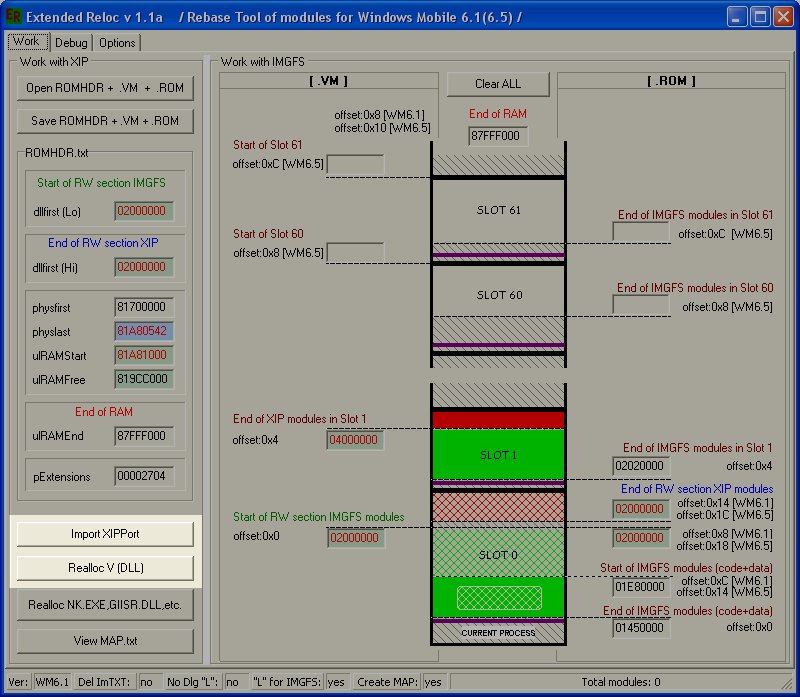
When you close XIPPort the batch will automatically launch ExtReloc.
Follow carefully these instructions:
********************************************************
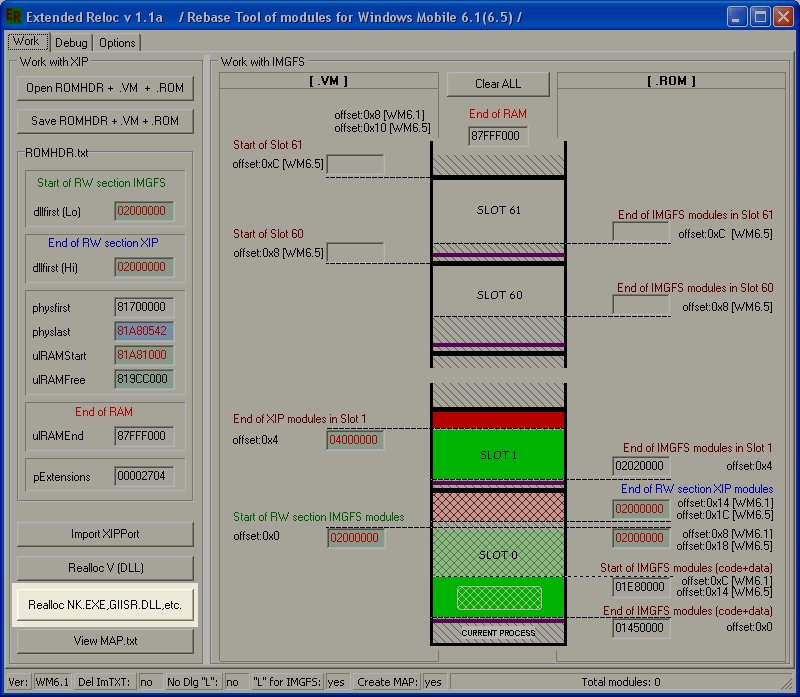
* [extreloc]  Import xipport                           *
* [extreloc]  ReallocV                                 *
* [xipport]   Realoc P                                 *
* [xipport]   Write maps                               *
* [extreloc]  Realloc nk.exe, gsiir, ... button        *
* [xipport]   Realloc P again                          *
* [xipport]   Write maps                               *
* [extreloc]  Drag the vertical white line to the left *
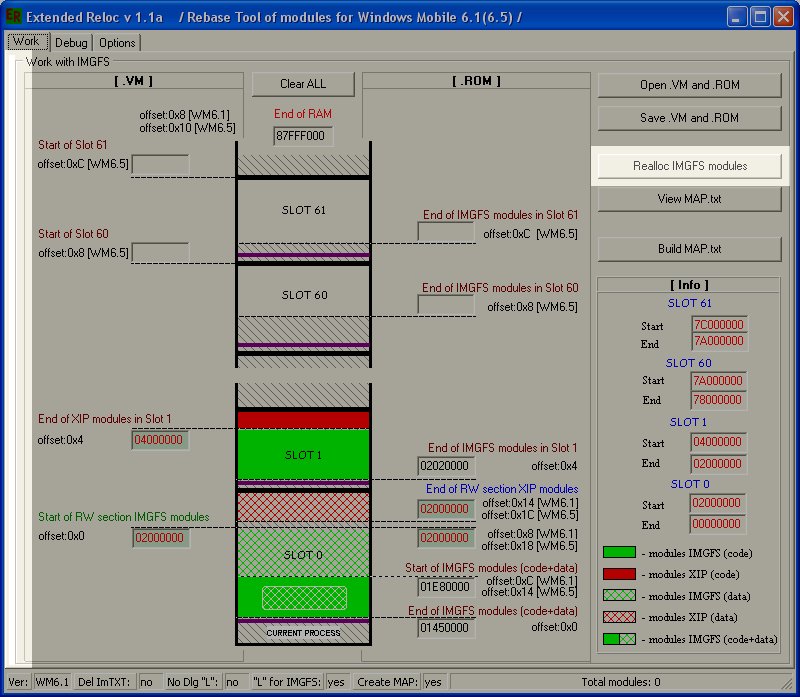
* [extreloc]  Realloc imgfs                            *
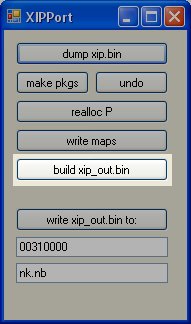
* [xipport]   Build xip_out.bin                        *
* [extreloc]  Close                                    *
********************************************************
that is, in a more extended way:
Extreloc:
- Import XIPPort. This launch a new XIPPort instance (we will need it later).
- ReallocV
XiPPort:
- ReallocP
- Write maps
Extreloc: - Realloc NK.EXE, GSIIR, DLL, etc
XiPPort:
- ReallocP (again)
- Write maps (Although I think this step is useless… but in doubt I'll leave it…)
Extreloc:
- Drag the vertical white line to the left to display the right side of the windows where lies the Realloc IMGFS modules button
- Realloc IMGFS modules
XIPPort:
- Build xip_out.bin
Close XIPPort, close Extreloc.
Now the file xip.bin should be inside new\1.
Step 4: Build imgfs
Run 8_imgfsfromdump.bat to rebuild the new imgfs.bin from files contained in BuildOS\temp.
The new imgfs will be created within new\1
Step 5: Reassemble flash.nb0
Launch 97_pmud1.bat.
The newly created imgfs.bin and xip.bin will be injected into flash.nb0.os.nb and combined with flash.nb0.PRE (stored in src\2) to obtain FLASH.nb0.
The result file is placed in new\4
Step 6: Create ciphone.bin
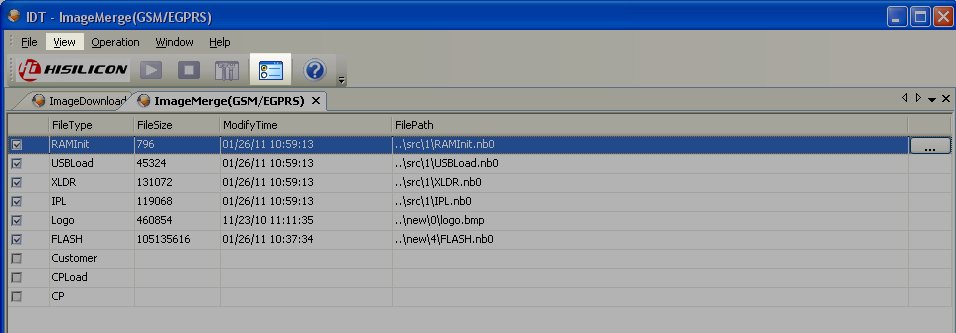
Launch 99_IDT.bat to start IDT and cook the new ROM ciphone.bin.
If IDT show up a window with Password request press Cancel (this window only appears if there isn't a file called ciphone.bin contained into IDT directory).
From the menu select View → Image merge
Select platform: GSM/EGPRS
Press merge and confirm the operation.
Enter the hw version: 1.0.0.0 5)
Save the image as ciphone.bin in the proposed path. Close the image merge tab.
Now relaunch IDT and put the phone in flash mode to start flashing of the new ROM.
Note 1: logo.bmp is the image displayed in the early booting stage of the telephone and is stored in new\0.
Note 2: Carefully check that the files listed in RAMInit, USBLoad, XLDR, IPL are correct and that they exists in the path specified. Otherwise a brick of the phone could occur.
Customize ROM
By performing the above steps, you can dump and then reassemble a pre-existing ROM. The operation itself is pretty fruitless, and acquires meaning only when the chef is willing to customize the original ROM changing it to suit his needs.
For this purpose it is possible to make changes:
- After the launch of 3a_buildos_from_dump.bat and before pressing the green arrow, if your're going to change packages in BuildOS\OEM, BuildOS\ROM or BuildOs\SYS.
- Upon completion of BuildOs going to work directly in the directory BuildOs\temp.
If your customizations cover XIP changing, then you will have to act in step 3, after XIP dump, going to work in ExtReloc\OUT before carrying out ExtReloc relocation steps.
